SKU: 14144919286
buy san pedro cactus

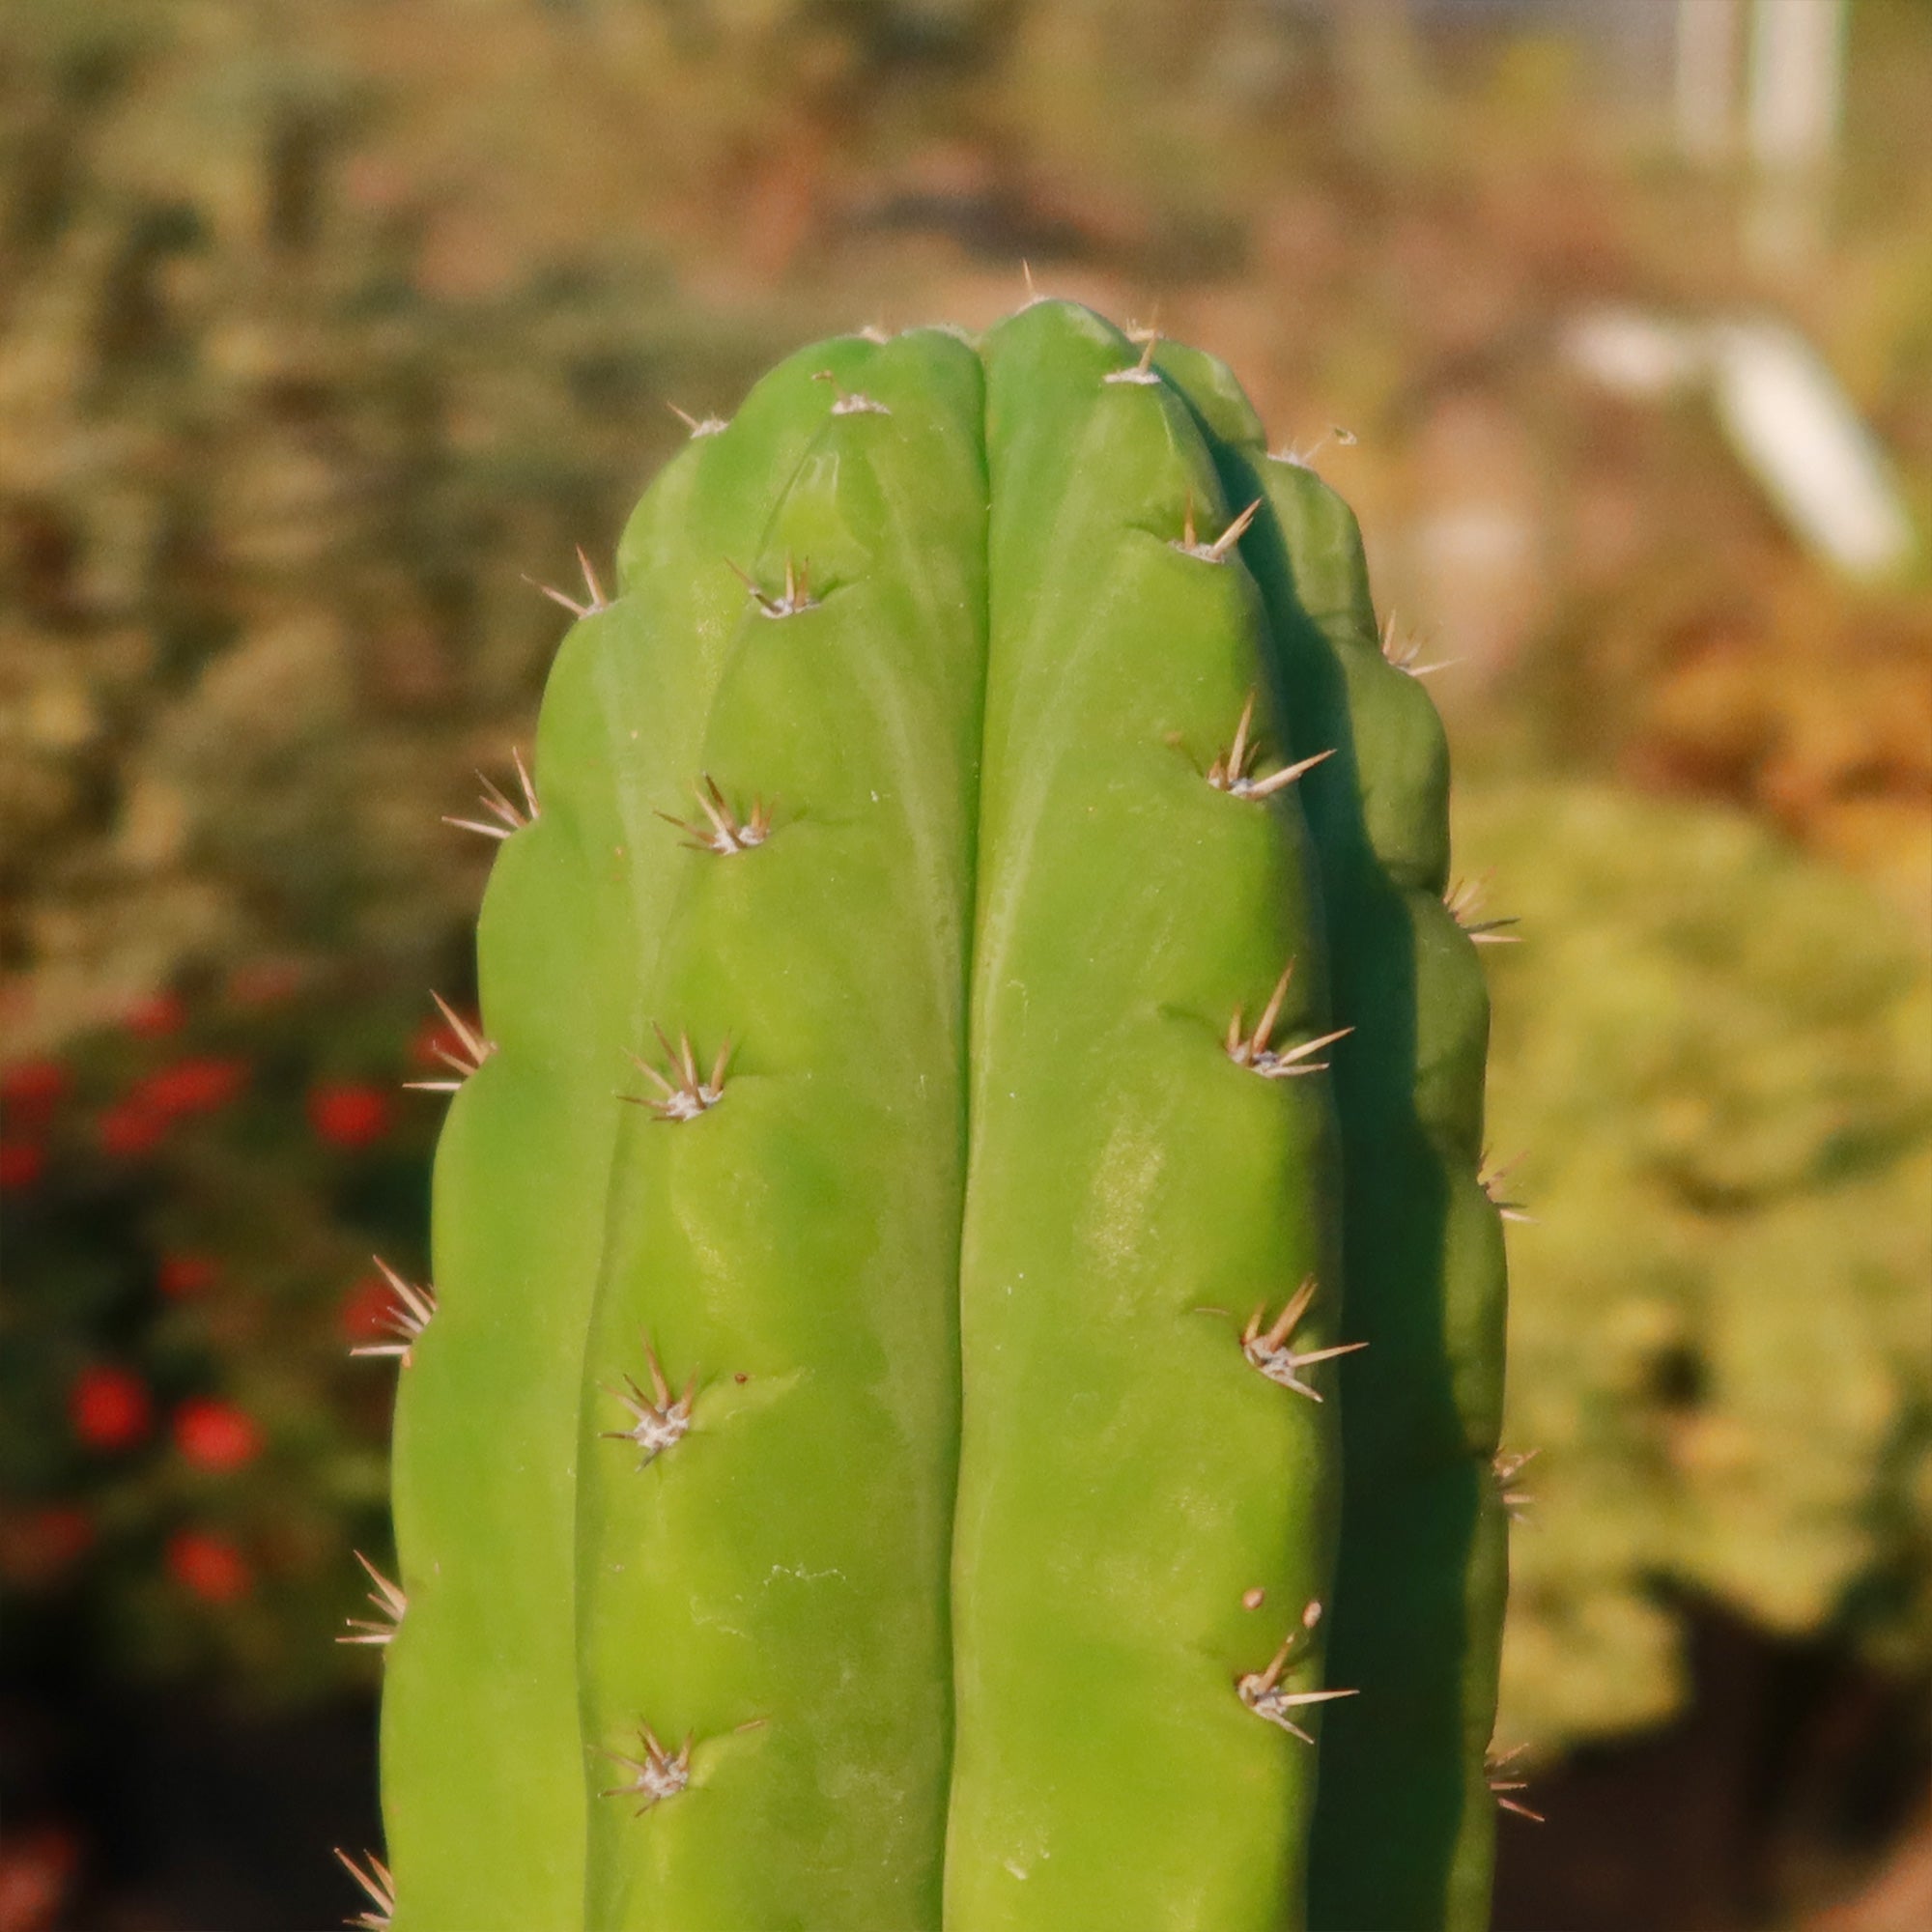
buy san pedro cactus San Pedro Cactus 'Echinopsis pachanoi' 7 Gal

Sale price$26.43 Regular price$29.37
Save 10%

Pay in installments of $7.34 with ShopPay, AfterPay and Klarna

Shipping Estimate
USA
  • USA
  • CAN

Ships within 48 hours · Estimated delivery Jul 16 - Jul 21

Promo Codes Available:

For Your Every Summer RSVP, with Code: SUMMER15

Description

buy san pedro cactus San Pedro Cactus 'Echinopsis pachanoi' 7 GalIntroducing the San Pedro cactus, also known as Echinopsis pachanoi (Syn. Trichocereus pachanoi) or Trichocereus Echinopsis pachanoi, which is among the superstars of the cactus world. This fast growing columnar cactus is also known as the Wachuma and Huachuma. Standing tall and proud, this magnificent San Pedro cactus columnar beauty can reach heights of up to 20 feet and spread its branches wide, up to six feet! With stems that range from vibrant

Introducing the San Pedro cactus, also known as Echinopsis pachanoi (Syn. Trichocereus pachanoi) or Trichocereus Echinopsis pachanoi, which is among the superstars of the cactus world. This fast-growing columnar cactus is also known as the Wachuma and Huachuma. 

Standing tall and proud, this magnificent San Pedro cactus columnar beauty can reach heights of up to 20 feet and spread its branches wide, up to six feet! With stems that range from vibrant green to mesmerizing blue-green shades, San Pedro is a true showstopper in any landscape. As your San Pedro cactus plant matures, its colors deepen and intensify, adding even more charm to its already captivating presence.  


When the San Pedro cactus flowers bloom, they emit a sweet fragrance that attracts pollinators like bees and butterflies.

The flowers are usually large and trumpet-shaped and come in various colors, including white, cream, and yellow. The petals have a delicate texture and often have a waxy appearance.

The fragrant flowers usually open during the day and close at night. They have a short blooming period, typically lasting for a day or two.

During the blooming season, which usually occurs in late spring or early summer, multiple flowers can bloom at once, creating a captivating sight.

The San Pedro cactus flowers are not only visually appealing but also have cultural significance. In some indigenous cultures, the flowers are used in traditional ceremonies and rituals. They are believed to have spiritual and healing properties.

The San Pedro cactus also has Pitahaya red San Pedro cactus fruits. These fruits are known for their sweet and refreshing flavor, making them a popular choice for consumption. Additionally, they are rich in antioxidants and vitamins, providing numerous health benefits.  

When and How to Water Your San Pedro Cactus 

San Pedro cactus is a drought-tolerant plant that can survive in dry conditions for long periods of time. However, regular watering is still needed to stay healthy. Generally, the San Pedro needs to be watered once every two weeks. During the summer months, when temperatures are high and the plant is actively growing, it may need to be watered more frequently.  

When watering your Trichocereus Echinopsis pachanoi, be sure to soak the soil thoroughly and allow it to drain completely. To prevent root rot and other issues, avoid overwatering.The leaves may become dry and brittle, and the cactus may stop growing if it is underwater. Over time, the San Pedro cacti may start to lose their shape and become misshapen.  

In addition to these physical symptoms, underwatering can also make the cactus more susceptible to pests and diseases. To keep your San Pedro cactus healthy and thriving, it is important to water it regularly and provide it with the right growing conditions. 

Light Requirements - Where to Place Your San Pedro Cactus

When grown indoors, your San Pedro cactus should be placed in a bright, sunny location where it can receive at least six hours of direct sunlight each day.

For outdoor cultivation, the San Pedro cactus requires a lot of sunlight to grow and thrive.

In its natural habitat, this cactus is exposed to direct sunlight for 4-6 hours each day.

If you live in an area with a lot of cloud cover or limited sunlight, you may need to supplement your cactus's light with artificial grow lights.

So, let's give your San Pedro cactus plant what it deserves—just the right amount of light to bloom into the ultimate showstopper! 

But beware; too much sun can lead to burns, so make sure you gradually increase exposure or bring it indoors during a heatwave. And if your Echinopsis pachanoi isn't getting enough light, it'll start stretching toward its source.

Optimal Soil & Fertilizer Needs 

Use well-drained soil that is designed specifically for your Echinopsis pachanoi cactus. These specialty soil mixes have been precisely developed to imitate well-draining desert soils. Commercial cactus soil is affordable and available online or at Home Depot.

Planet Desert specializes in cacti and has a specialty cactus potting mix that contains 5 natural substrates and organic mycorrhizae to promote the development of a strong root system that helps your San Pedro cactus thrive. 

When it comes to fertilizing your San Pedro cactus plant, it only needs a small amount of fertilizer applied once a year in the spring. Cacti prefer fertilizer with lower doses of NPK, with a maximum ratio of 5-10-5 which is higher in phosphorus than nitrogen. Remember, overfertilization can lead to root rot or even the death of the plant, so be cautious! 

Hardiness Zones & More 

San Pedro cactus is a hardy plant that can grow in a variety of different climates. It is native to the Andes Mountains, where it can be found growing at high altitudes in a range of temperatures. In the United States, San Pedro cactus is typically grown in warm, dry climates such as those found in the southwestern states. 

When growing indoors, the San Pedro cactus prefers a warm and dry environment. It thrives in temperatures ranging from 55°F to 75°F. Aim for a humidity level of around 40% to 50% to create an ideal indoor environment for your San Pedro cactus.

For outdoor cultivation, this cactus is hardy in USDA zones 8–11, which means that it can tolerate temperatures as low as 20 degrees Fahrenheit.

If you live in an area with extreme temperatures, you may need to take extra precautions to ensure that your San Pedro cactus Echinopsis pachanoi, stays healthy. 

In addition to its hardiness zone, it is also important to consider the humidity requirements of the San Pedro cactus. This cactus is adapted to dry, arid environments and does not require a lot of humidity to grow. In fact, high levels of humidity can be detrimental to the health of the plant, as they can promote the growth of mold and fungal diseases. 

When growing San Pedro cactus, it is important to provide good air circulation and avoid overwatering to prevent the buildup of excess moisture around the base of the plant.

Wildlife - San Pedro Cactus Attracts the Following Friendly Pollinators

The San Pedro Cactus flowers attract several friendly pollinators such as bees, butterflies, and hummingbirds. These pollinators are essential for the reproduction of the cactus and play a crucial role in maintaining the ecosystem's biodiversity.

Butterflies
Bees
Hummingbirds
Lady Bugs
Multi Pollinators
Other Birds

According to ASPCA, the San Pedro Cactus is safe for humans but can be mildly toxic to cats and dogs if ingested in a large amount. However, it is safe to touch and handle, making it a popular choice for ornamental cactus gardens. However, it is important to keep San Pedro Cactus out of reach of pets to prevent accidental ingestion.

How to Propagate Your San Pedro Cactus

Propagating the San Pedro cactus can be done through seeds or cuttings, but each method has its pros and cons. While cuttings are a quicker option, this method involves cutting off the top of the plant, which permanently alters its tall, elegant columnar form. For this reason, propagation by cuttings is only recommended if the plant has already broken or been damaged. In such cases, you can take a healthy segment, allow it to be callous for about a week, and plant it in well-draining soil to root. However, this approach is less ideal for those who wish to maintain the plant's natural aesthetics.

Seed propagation is a method for cultivating new cacti plants, and preserving their beauty. Harvested from mature cacti's fruit, seeds are cleaned, dried, and sown onto a well-draining soil mix. Despite the patience required, this method allows for healthy plants without compromising the parent cactus's appearance, despite the need for indirect sunlight or grow light.

Key Takeaways

  1. Unlike many other cacti, the San Pedro grows quickly, often reaching heights of 10–20 feet under ideal conditions, making it a popular choice for ornamental gardens.
  2. This cactus is highly adaptable, thriving in a variety of climates and requiring minimal care. It is drought-tolerant, hardy in USDA zones 8–11, and grows well in nutrient-rich, well-draining soil.
  3. San Pedro Cactus is a drought-tolerant that thrives in arid conditions and requires minimal watering. It is a popular choice for xeriscaping and landscaping in dry climates due to its ability to store water in its fleshy stems.

Final Thoughts

Overall, the San Pedro cactus (Echinopsis pachanoi) is a remarkable plant with unique features. It is characterized by its tall, columnar shape and beautiful white or yellow flowers. The cactus can grow to impressive heights, reaching up to 20 feet in optimal conditions. Its spines are relatively short and are arranged in clusters along the ridges of the cactus. The San Pedro cactus is a low-maintenance plant that thrives in well-draining potting soil and enjoys ample sunlight. It prefers a dry environment and can tolerate drought, so it should be watered sparingly, allowing the soil to dry out between waterings.

Don't miss out on this opportunity to add something truly exceptional to your garden. Buy San Pedro cactus for sale today to enhance your collection! 

Shipping Notes
  • Free Standard Shipping on $100+ Orders to the USA.
  • Except Preorder products are shipped in 48 hours.
  • Delivery to the USA:
  1. Standard Shipping : 3-10 business days
  • If time is of the essence, please consider selecting expedited delivery for faster service.
Exchange/Return Notes
  • We offer a 30-day return/exchange service after receiving.
  • Final sale items are not eligible for returns or exchanges.
  • To process your return/exchange, please contact us at [email protected]
  • Please click here for more details>>> Return & Exchange Policy
SKU: 14144919286

Discover Niche Categories That Outsell buy san pedro cactus

Top-Converting Item to Boost Your Average Order

4.7 ★★★★★
Based on 14 reviews
Sort
Highest Rating
Newest First
Oldest First
Product Reviews
A
Verified Purchase
Amy Biggs
Fort Morgan, US
★★★★★ 5
40 Years Young and Ready to Bring My RV Back to Life!
As a happy 40-year-old guy who takes a lot of pride in his RV, I’ve been on a mission to remove all the oxidation and restore that clean, glossy finish. After doing my homework, I decided to try Poli Glow Boat & RV Restoration, and I couldn’t be more excited about the results so far. I honestly can’t wait to see what it looks like once I’m completely finished. The quality of this product really stands out. It doesn’t feel like some quick temporary fix — it’s clearly made to properly restore fiberglass surfaces. The application use is straightforward, especially if you follow the prep steps carefully. Once I got into the rhythm of it, the process felt manageable and even kind of satisfying. What impressed me most was the smoothness it brought back to the surface. Areas that were dull and chalky from oxidation are starting to look deep and refreshed again. It’s doing a solid job with light scratch removal too, especially the small surface marks that naturally build up over time. I also appreciate the added layer of durability it promises. After putting in the work, I want something that’s going to last and protect the finish moving forward. And for anyone dealing with minor staining or corrosion spots, it definitely helps improve the overall look, contributing to better rust removal results around metal fixtures and trim. If you’re like me and want your RV looking proud and road-ready again, this feels like a serious step in the right direction. I’m genuinely excited to see the full transformation once I finish the entire exterior. Definitely worth the effort.
WAS THIS REVIEW HELPFUL?YesReportShare
Reviewed in the United States on February 19, 2026
A
Verified Purchase
Amazon Customer
Dallas, US
★★★★★ 5
Great product, great support, looks better than new!
I couldn't possibly be more pleased with how my RV looks after Poli-Glow! I have a 2018 Rockwood 21' RV trailer that had not been treated before, so there was oxidation / fading from being in the Arizona sun - it just looked dull (the color is mostly beige). I am not usually a DIY'er. I researched options online and really appreciated the educational videos on Poli-Glow so I went with that. I don't have buffer machine or anything like that so I liked the idea of being able to do everything by hand. (Even if I had a buffing machine, I think that would have been more tiring having to climb a ladder with it and holding it over my head while applying a traditional wax - plus having to change between it and buffing cloths before wax would dry). Plus I like that this is a longer lasting treatment than a traditional wax. You will need some time - I spread my project over 4 days (day 1 - cleaning the RV and separate UV protection of the roof and awning; day 2 - Poli-Prep the whole RV; day 3 and day 4 Poli-Glow half the RV day 3 and finish day 4). Doing the Poli-Prep was easy. I mixed it in a spray bottle. I hosed down the section of the RV I was getting ready to scrub, sprayed on the Poli-Prep, scrubbed the area with the scrub brush that came with the kit, then hosed the area down and let it air dry. I only used about a third of the bottle of Poli-Prep. After the Poli-Prep the RV looked better than it did before, but that's not where the real shine comes from. I appled Poli-Glow to the RV surface, over the decals, plus all the black trim areas. The coats dried quickly so I didn't have any extra downtime between coats. When I finished a coat I walked about 30 feet to my working station in the shade, added more Poli-Glow to the mitt, and by the time I got back to the RV the previous coat was dry and ready for the next coat. Overall I worked a side of the RV from left to right; within a section I started on the bottom section up to almost as high as I could reach and used a ladder for the top half. The first coat get absorbed pretty thoroughly so the area looks only partially polished; by the 2nd - 3rd coat the shine really starts to show. Since I am in AZ, I applied the recommended 10 coats of Poli-Glow (10 coats to about a 5 to 6 foot section, then move the ladder to the next section). Overall I used 2 bottles of Poli-Glow with about a half inch left in the bottle. I did time my efforts both days to work on sections that weren't in the direct sun, making sure the area I would work on was cool or warm, not hot. Support was SUPER-FANTASTIC! I sent questions via Amazon contact seller and received very fast responses. They also sent me an email link to other videos from a detailer, so by the time I started I was confident and ready. During the project I sent pictures and they provided fast feedback that I was in fact progressing very well - very encouraging and confidence boosting. Thank you Sean! So yes, it took some time, but it was so worth it! It is shiny and beautiful and looks like new (actually better than new)! My neighbor has already asked me about it so he can do his RV. After I was done I took my victory lap - I sat in my driveway staring at it while sipping a beer, basking in the reflection of the sunset mirroring off the RV!
WAS THIS REVIEW HELPFUL?YesReportShare
Reviewed in the United States on March 13, 2026
C
Verified Purchase
Cindy
Belleville, US
★★★★★ 5
Oxidized fiberglass RV looks new again!
WOW! I researched high and low for a product that would bring back the shine to our 10 year old travel trailer that has fiberglass panel siding. There were countless videos watched, numerous products tried without success and then I discovered PoliGlow Restoration Fiberglass Kit for boats and RVs. It came with the cleaner and pad to remove the oxidation and a bottle of Superior Fiberglass Restoration, Protection and Shine. This product is amazing. The condition on the exterior of our RV had become a bit embarrassing, but now it shines with the newest of them. The instructions are easy to follow, there are even videos of the process! It does require several coats of the Restoration and Shine product. The cost is extremely reasonable for the end result of the RV. The shine is amazing! Highly recommend this product. PS It was extremely easy to apply as I had my husband do it, he didn’t complain at all and was thrilled with the result!
WAS THIS REVIEW HELPFUL?YesReportShare
Reviewed in the United States on July 24, 2025
C
Verified Purchase
CV S.
Bozeman, US
★★★★★ 5
Wow this stuff works!!
Wow. What an amazing product. I own a 1976 Bertram 42 aft cabin motor yacht. The previous owner had not waxed it in a good long time. I spent a weekend with four friends sweating and laboring using the traditional wet sanding, buffing, and waxing it's heavily oxidized finish. One of the friends helping was a former professional boat detailer. The results were ok. The wax job lasted about six months before it looked like crap. There's a lot of controversy over Poli Glow. A number of the old fellows who sit around drinking coffee in the marina clubhouse swear that nothing should go on a boat except the most expensive and laborious traditional wax, preferably applied by a crew of of professionals. They universally ranted about the failings of Poli Glow despite having no practical experience. They also talk more than they actually boat, so I didn't listen to them. I was cautious, and started with my heavily oxidized flybridge. I wanted to work my way top to bottom and I figured if I hated the look, I could stop and it wouldn't really noticeable. It was easy to use. I bought the complete kit. Mixed the prep. Sprayed and scrubbed. Wow that stuff gets things clean and even. I wiped the Poli Glow on with the provided mitt. Tip: really, you needs to let each coat dry before applying the next. It was noticeable alright. From the dock you can now see an actual reflection of my antennae in the now shiny Fiberglas. It's amazing. I did find that the more oxidized portions were thirsty as heck and took a lot of coats. The results are worth it. Application is way less laborious than buffing and waxing. If you can wipe clean a countertop in your kitchen or galley you can Poli Glow like a pro. It's that stupidly easy. Where the gel coat was reasonably smooth the product built a mirror finish. I didn't even put her on the hard. I applied it while it was docked. I couldn't have five that with a buffer. My pro detailer friend was totally surprised at the result. Bottom line: if you have an older sad looking boat this stuff can make it shiny and happy with minimal labor. Good stuff well worth the price.
WAS THIS REVIEW HELPFUL?YesReportShare
Reviewed in the United States on June 29, 2017
P
Verified Purchase
pdb
Dallas, US
★★★★★ 4
Overall great product, especially on solid colours.
I bought a 33 year old boat that is mostly white gelcoat. Some of the white had yellowed in areas and there were bright spots where I removed stickers and hull numbers. The boat also has red and blue metal flake that was quite faded and gritty. The flake is large particles of metal or paint or whatever, not fine little glitter bits like they do now. I called Poli Glow Canada and the guy told me to use 600 grit wet sandpaper to smooth out the metal flake and then wash with the Poli Prep. The white came up pretty clean, but I had to use the sandpaper on some areas to take off the yellow. The Poli Glow went on really easily and quickly. When you are doing it, keep an eye on the the edges of the applicator. If the liquid starts to harden, wash the edges in warm water to get them soft again. I didn't do this and have some small bumps kind of like fuzz off a paint roller, which I guess is bits of dried liquid that came off the applicator. You will also get streaks if the edges are dry, but the next coat fixes that right away. Check after each coat to ensure it is smooth. I'm pretty sure a quick pass with the sandpaper would have removed the bumps, but by the time I was finished, I didn't want to mess with it. In the end, the white turned out looking great. The flake is definitely better than when I bought it, but it only shines at about 50% of original (compared to the flake on the transom which was in really good condition) and I was expecting better based on the before and after shots on their site. There are also some streaks in the flake from certain angles where I guess my sanding pressure wasn't consistent.
WAS THIS REVIEW HELPFUL?YesReportShare
Reviewed in the United States on November 26, 2013

recommand products