Shipping Estimate
USA
- USA
- CAN
- USA
- CAN
Ships within 48 hours · Estimated delivery Jul 7 - Jul 12
For Your Every Summer RSVP, with Code: SUMMER15
Description
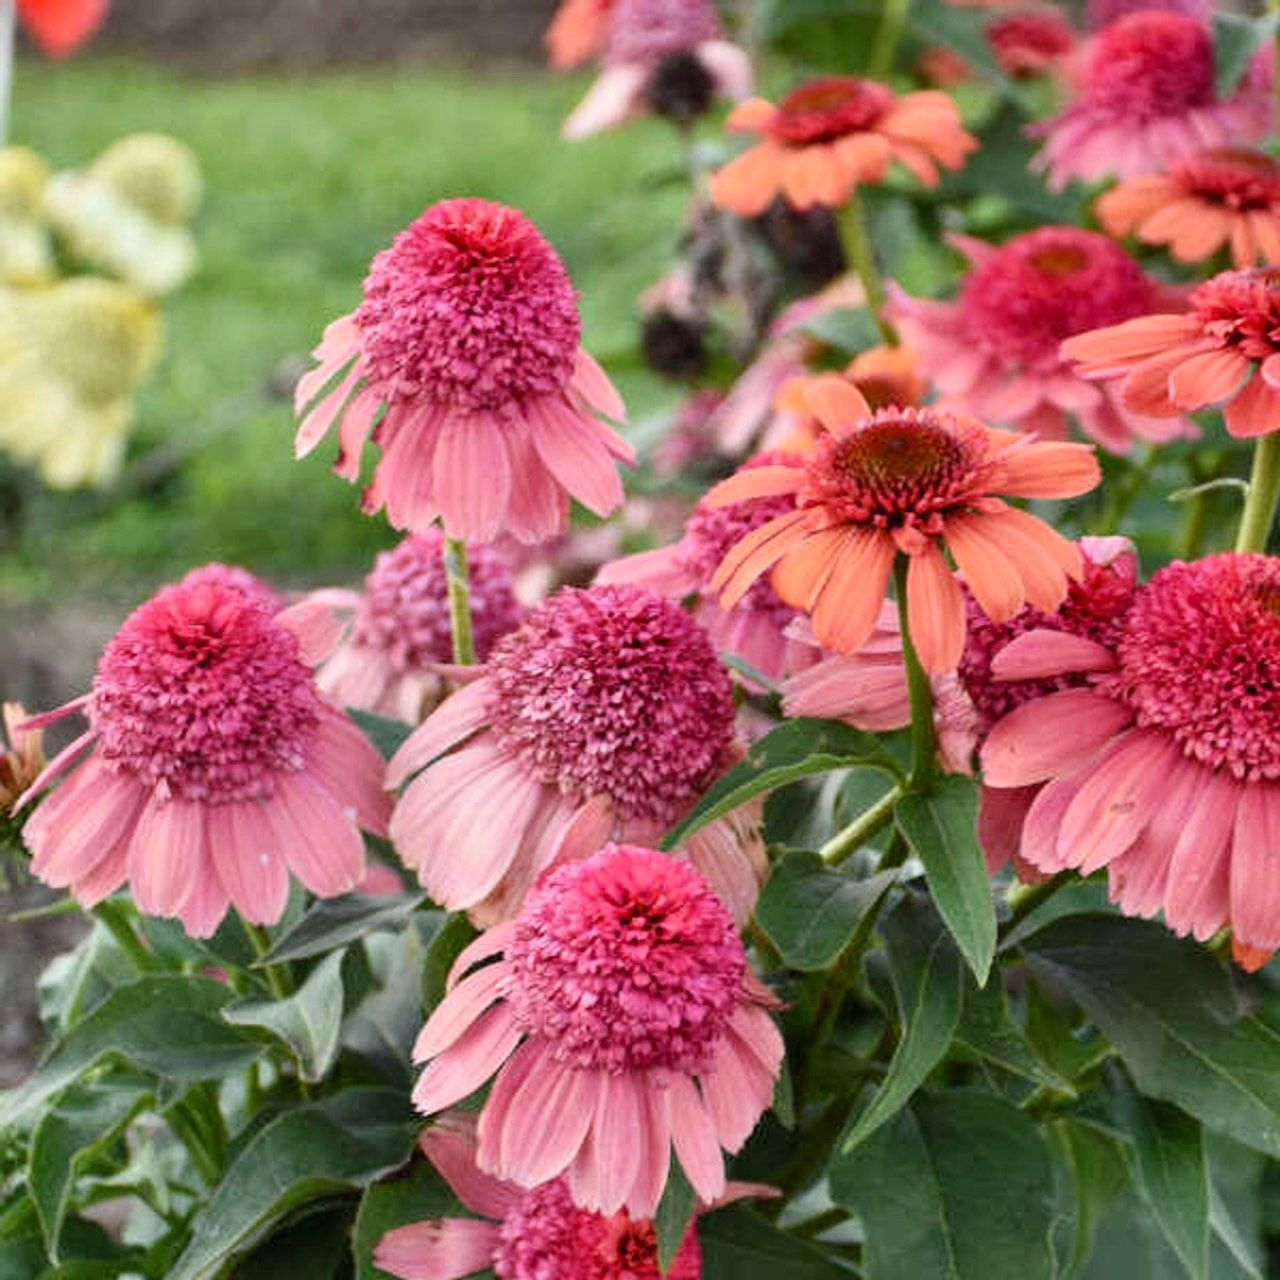
hybrid flower seeds Double Pink Sherbet Coneflower Seeds ~ Echinacea Hybrid ~ Flowering Plant ~ Unusual Flowers ~ Flower ~ Growing Flowers ~ Garden ~ PlantConeflowers have raised cone like centers (hence, their name, which attract butterflies and bees. After bloom, the seed heads attract songbirds, such as goldfinches. Coneflowers love heat and are trouble free once established in a traditional garden or wildflower meadow. ~ Includes ~ ~ 25 Seeds. ~ Grow and Care Instructions. Follow Me Instagram: YourPlantBitch Facebook: Your Plant Biitch Please visit me YourPlantBitchcom, explore all of my exclusive
Coneflowers have raised cone-like centers (hence, their name, which attract butterflies and bees. After bloom, the seed heads attract songbirds, such as goldfinches. Coneflowers love heat and are trouble-free once established in a traditional garden or wildflower meadow.
~ Includes ~
~ 25 Seeds.
~ Grow and Care Instructions.
✨ Follow Me ✨
Instagram: YourPlantBitch
Facebook: Your Plant Biitch
💕 Please visit me YourPlantBitchcom, explore all of my exclusive collections including my newest items. Rest assured, my main concern is my customers always!!! I try to provide the best customer service and strive to create a positive shopping experience for my customers. I’m always available to answer any questions or concerns you may have before and after your purchase. Custom orders are welcome!!! I can even include a handwritten gift card for no additional cost. Feel free to send me an offer since I will always do my absolute best to work with my customer’s offers. Contact me with any questions or if you’re interested in my sold~out items or need different quantities.
💗Grow and Care Instructions for Coneflowers💗
~ Grow Instructions ~
Dampen a Paper Towel. Fold a paper towel in half.
Treat the Seeds. Sprinkle the coneflower seeds on one-half of the paper towel.
Prep the Pots. Fill 8-inch-deep seedling pots with moistened potting soil.
Sow your coneflower seeds on top of the soil and gently press them in without covering them completely.
Cover the Pots.
Remove the Bag.
Transplant the Seedlings.
Water the Coneflowers.
The seeds need light to germinate successfully. Coneflowers prefer full sun and well-draining soil. Coneflowers are very tolerant of poor soil conditions, but they bloom best in soil that’s nutrient rich. Loosen soil to a depth of 12 to 15 inches and mix in a 2 to 4 inch layer of compost or aged manure. Choose a location where the coneflowers won’t get shaded out nor sit in wet soil. They will spread readily in the right conditions.
* Plant coneflowers when small, with blooms on the way, in spring or early summer.
* Seeds can be started indoors 8 to 10 weeks before the last spring frost last spring frost date. Or sow them outdoors when the soil has warmed to at least 65°F/18°C. Seed-sown plants are not likely to bloom for 2 to 3 years.
* Note: Don’t cut back coneflower plants and they’ll self-seed readily.
* If dividing or transplanting coneflowers, do so in the spring or fall.
* Plant coneflowers about 1 to 3 feet apart, depending on the mature size of the variety.
* If planting from a pot, dig a hole about twice the pot’s diameter. Set the plant so that the root ball is level with the soil surface. Fill in to the top of the root ball.
* Water it thoroughly at planting.
* Spread thin layers of compost, then mulch, on the soil surface to help keep plants moist and prevent weeds.
Coneflowers are drought tolerant, but new plants need water occasionally, and more often if the spring season is especially dry.
* Put a thin layers of compost and mulch around the plants to help keep them moist and prevent weeds.
* Native in ground seldom need fertilizer. Ensure your soil has plenty of organic matter when you plant.
* In late spring, provide supplementary water only if the season is extremely dry or your coneflowers are newly planted.
* To prolong the bloom period, deadhead when flowers fade. Cut back stems to a leaf near a bud. Deadheading in late season prevents self-seeding and bird-feeding.
* Optional: To encourage delayed blooming for fall enjoyment, cut coneflower plants back by 1 foot when plants come into bloom. This will result in later-flowering, more-compact growth because coneflowers can get leggy. Cut some and not others for more staggered bloom heights and times.
* Beneficial wasplike soldier beetles may appear in August. They feed on insect eggs and larvae and pollinate plants. Do not harm them.
* In late fall in colder regions, lightly spread mulch around plants.
* Optional: Consider leaving late-season flowers on the plants to mature. The seed heads will attract birds and promote self-seeding. Deadheading will prevent self seeding, if this is your preference. To deadhead, cut the dead flower back to a leaf where you can see a bud ready to swell.
* Divide or transplant coneflowers in spring or fall.
Growing in a Pot
We tend to grow coneflowers in the ground as perennial plants, but you can certainly grow them in pots if the containers are deep enough for the plant’s taproot. Use 2- or 3-gallon (or larger) pots, with drainage holes. Spread crushed gravel in the bottom of the pots for drainage. Fill the pot halfway with potting mix. Tamp down. Plant the root ball an inch below the rim of the container, spreading out the roots. Add soil slowly until it is even with the top of the root ball, tamping down lightly. Water deeply.
* Keep pots in partial shade for 2 to 3 days, then place in full morning sun and partial afternoon shade.
* Always water deeply at soil level with the soil is dry to the touch. Water on leaves can cause fungal disease.
* Fertilizer every couple of seeks with a water-soluble 10-10-10 product.
* Deadhead just below the base of the flower for continued bloom.
* To overwinter, prune plants to soil level when plant growth slows in fall.
* Move to a cool (40º to 50ºF) area, with low to moderate indirect light.
* Check the soil every couple of weeks and water lightly when the top 3 inches are dry.
* When new.growth appears in spring, move to a brighter, warmer (60º to 70ºF) area. Moving the plant helps to prepare it for living outdoors in the spring and summer.
* Do not water leaves from above, as this can encourage fungal disease on leaves. Instead, water at soil level. Use an insecticidal soap or neem oil solution spray if you see any aphids or pests.
* Every 3 to 4 years, in spring after new growth has started, divide and repot echinacea plants.
Thank you so very much for supporting my small business!!!🪴Happy Planting 🪴
💚 Best Wishes, Your Plant Bitch (Quinn)
Shipping Notes
- Free Standard Shipping on $100+ Orders to the USA.
- Except Preorder products are shipped in 48 hours.
- Delivery to the USA:
- Standard Shipping : 3-10 business days
- If time is of the essence, please consider selecting expedited delivery for faster service.
Exchange/Return Notes
- We offer a 30-day return/exchange service after receiving.
- Final sale items are not eligible for returns or exchanges.
- To process your return/exchange, please contact us at [email protected]
- Please click here for more details>>> Return & Exchange Policy