Pay in installments of $5.47 with
 ,
,
 and
and

Shipping Estimate
USA
- USA
- CAN
- USA
- CAN
Ships within 48 hours · Estimated delivery Oct 18 - Oct 23
 Promo Codes Available:
For Your Every Summer RSVP, with Code: SUMMER15
Description
tall succulent species Shop 'Pedilanthus bracteatus - Tall Slipper Plant' Care and Growing GuideIntroducing the Pedilanthus bracteatus, known as tall slipper plant, which is a unique and eye catching plant native to Mexico and Central America. The scientific name comes from the Greek words 'pedil' meaning 'shoe' and 'anthos' meaning 'flower', referring to the shoe shaped flower structures and the species' epithet meaning 'bearing bracts'. The Pedilanthus bracteatus is also referred to by other common names such as lady slipper plant, Candelilla,
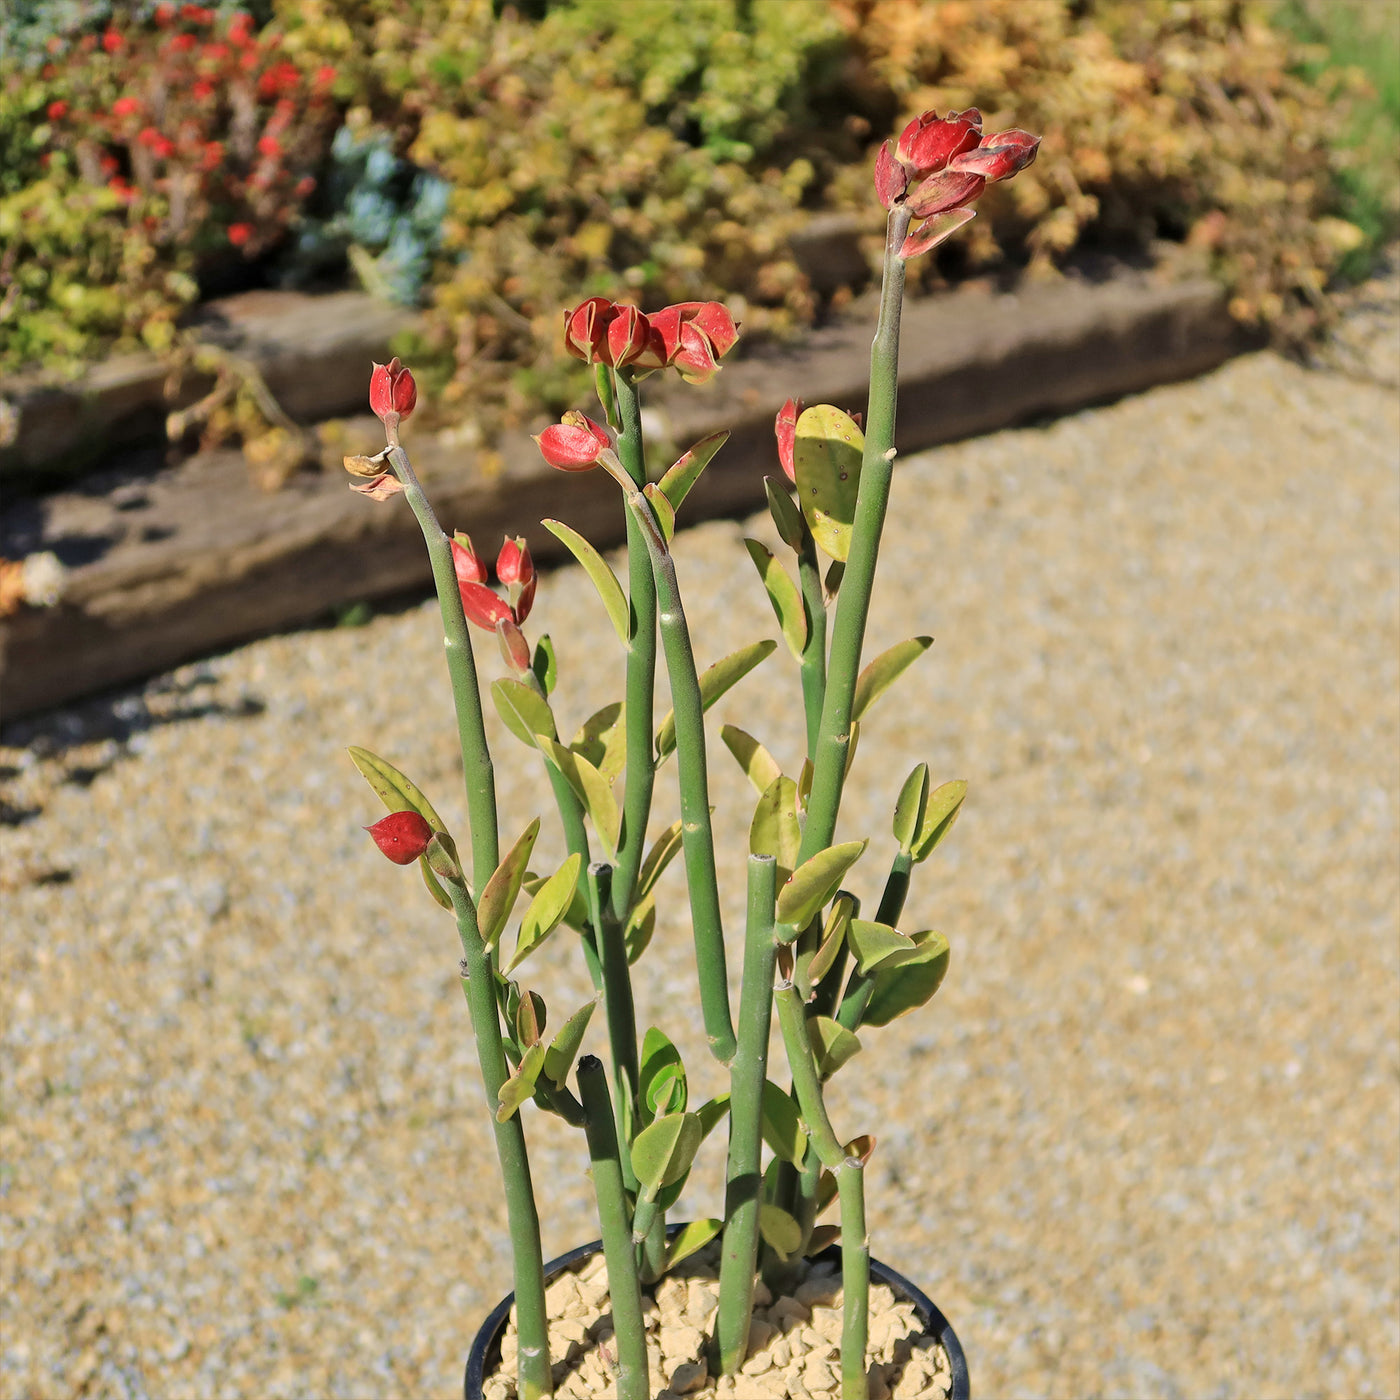
Introducing the Pedilanthus bracteatus, known as tall slipper plant, which is a unique and eye-catching plant native to Mexico and Central America. The scientific name comes from the Greek words 'pedil' meaning 'shoe' and 'anthos' meaning 'flower', referring to the shoe-shaped flower structures and the species' epithet meaning 'bearing bracts'.
The Pedilanthus bracteatus is also referred to by other common names such as lady slipper plant, Candelilla, Slipper flower, slipper spurge, and Zigzag Plant due to the shape of its flowers and the zigzag pattern of its stems.
The Pedilanthus bracteatus, a succuent plant in the genus Euphorbia, and the name has been reclassified multiple times.
The current treatment is to include it with Euphorbia bracteata, naming it Euphorbia bracteata until it's more widely recognized.
It does not have thorns and can be used as a poolside plant.
The upright slipper succulent plant can grow up to 6 feet tall and has narrow cylindrical light green stems and ovate leaves.
It has a thick mid-vein near branch tips and sparsely hairy vegetative parts, with a prominent mid-vein on the lower surface of the woody root crown. The stems of the slipper plant are thick, and leafless before flowering, and have a zigzag or accordion-like growth pattern, adding to its visual appeal.
The Pedilanthus bracteatus blooms during the late spring to early fall with small, tubular slipper flowers that are typically red or orange in color. The curiously shaped red cyathia (flower structures with separate male and female parts) are enclosed in rounded reddish-pink bracts near the branch tips. These flowers have a unique shape that resembles a slipper or shoe, hence the plant's common name slipper plant. The flowers are arranged in clusters at the ends of the stems, creating a beautiful display when they bloom.
In terms of propagation, the tall slipper plant can be propagated through stem cuttings. Simply take a healthy stem cutting from longer stems, allow it to dry for a few days to form a callus, and then plant it in well-draining soil. With proper care and conditions, the cutting will develop new growth.
Watering Needs
When it comes to watering the Pedilanthus bracteatus, it's important to strike a balance. This plant prefers a moderate watering routine. You don't want to overwater it, as it is susceptible to root rot, but you also don't want to let it dry out completely.
A good rule of thumb is to water the slipper plant when the top inch or so of the soil feels dry to the touch. This ensures that the roots have enough moisture without sitting in wet soil for too long. In the spring and summer, during the growing season, you may need to water it more frequently. In the cooler months, you can reduce the frequency of watering.
Remember, it's always better to underwater than overwater the slipper plant. If in doubt, it's safer to wait a bit longer between waterings than to risk causing root rot.
Pro Tip
Instead of using regular tap water that has chlorine, you can try using filtered or distilled water. This can help prevent the buildup of minerals in the soil, which can sometimes affect the plant's health. It's like giving your slipper plant a refreshing treatment. Just make sure the water is at room temperature before you give it a drink
Light Requirements
When growing indoors, this tall slipper plant Pedilanthus bracteatus generally prefers bright, indirect light. Find a spot near a window where it can receive plenty of filtered sunlight throughout the day. Avoid placing it in direct sunlight, as this can scorch its leaves. If you notice the plant leaning towards the light source, rotate it occasionally to promote even growth.
For outdoor cultivation, your Pedilanthus bracteatus can thrive in partial shade to full sun for at least 4-6 hours a day, depending on your climate. In areas with hot summers, providing some afternoon shade can help protect the plant from intense sunlight. Just make sure it still receives a few hours of direct sunlight each day to support healthy growth and flowering.
Remember that each environment is unique, so it's important to observe your tall slipper plant and adjust its placement accordingly. If you notice the leaves turning pale or yellow, they might be getting too much direct sunlight. On the other hand, if the plant becomes leggy or doesn't produce flowers, it might need more light.
Optimal Soil & Fertilizer Needs
The Pedilanthus bracteatus favors very airy, sandy soil that drains well. Planting them in ordinary soil will result in compacted roots, stunted growth, and most likely root rot. Instead, make or buy a well-draining potting mix, or ideally use our specialized potting mix, opens in a new tabGo to soil cactus mix blend 1 gal 4 qt cacti succulent dirt compost growing media that contains 5 natural substrates and mycorrhizae to promote the development of a strong root system that helps your lady slipper succulent to thrive.
As for fertilizer, the slipper plant doesn't require a lot of feeding. Once a year in the spring, during the active growing season, you can use a balanced (5-10-5), water-soluble NPK fertilizer diluted to half strength. During the cooler months, when the plant is in its dormant phase, you can reduce or even stop fertilizing altogether. It's important not to over-fertilize, as it can lead to salt buildup in the soil, which can harm the plant.
Remember to always follow the instructions on the fertilizer packaging and adjust the frequency and strength based on the specific needs of your slipper plant. It's also a good idea to water the plant before applying fertilizer to avoid any potential root burn.
Hardiness Zones & More
When you are growing your Pedilanthus bracteatus indoors, it can thrive in average room temperatures between 60°F to 75°F. It can tolerate slightly cooler temperatures, but it's best to avoid extreme cold drafts or sudden temperature fluctuations. As for humidity, the slipper plant can handle average indoor humidity levels, but it appreciates a slightly higher humidity. You can increase humidity by placing a tray of water near the plant or using a humidifier.
For outdoor cultivation, it is typically hardy in USDA hardiness zones 9 to 11. These zones generally have mild to warm climates with minimal frost or freezing temperatures. In colder regions, it's best to grow the slipper plant as a potted plant that can be brought indoors during the winter months. If you live in a drier climate, you can mist the plant occasionally or place it in a location with higher humidity, such as near a water feature or in a greenhouse.
Final Thoughts
Overall, the tall slipper plant (Pedilanthus bracteatus) is a fascinating and visually appealing succulent. It's loved for its slipper-shaped flowers, the plant reaches about 6 feet tall and 3 ft wide. With its thick, succulent stems and beautiful red or orange tubular flowers, it adds a touch of visual appeal to any space. Taking care of the slipper plant is relatively easy, as it prefers well-draining soil, moderate sunlight, and infrequent watering. Whether grown indoors or outdoors, this plant is sure to add a touch of beauty and intrigue to any space.
Shipping Notes
- Free Standard Shipping on $100+ Orders to the USA.
- Except Preorder products are shipped in 48 hours.
- Delivery to the USA:
- Standard Shipping : 3-10 business days
- If time is of the essence, please consider selecting expedited delivery for faster service.
Exchange/Return Notes
- We offer a 30-day return/exchange service after receiving.
- Final sale items are not eligible for returns or exchanges.
- To process your return/exchange, please contact us at [email protected]
- Please click here for more details>>> Return & Exchange Policy