SKU: 70837372091
plastic plant netting

plastic plant netting Trellis Netting

Sale price$24.20 Regular price$26.89
Save 10%

Pay in installments of $6.72 with ShopPay, AfterPay and Klarna

Shipping Estimate
USA
  • USA
  • CAN

Ships within 48 hours · Estimated delivery Oct 14 - Oct 19

Promo Codes Available:

For Your Every Summer RSVP, with Code: SUMMER15

Description

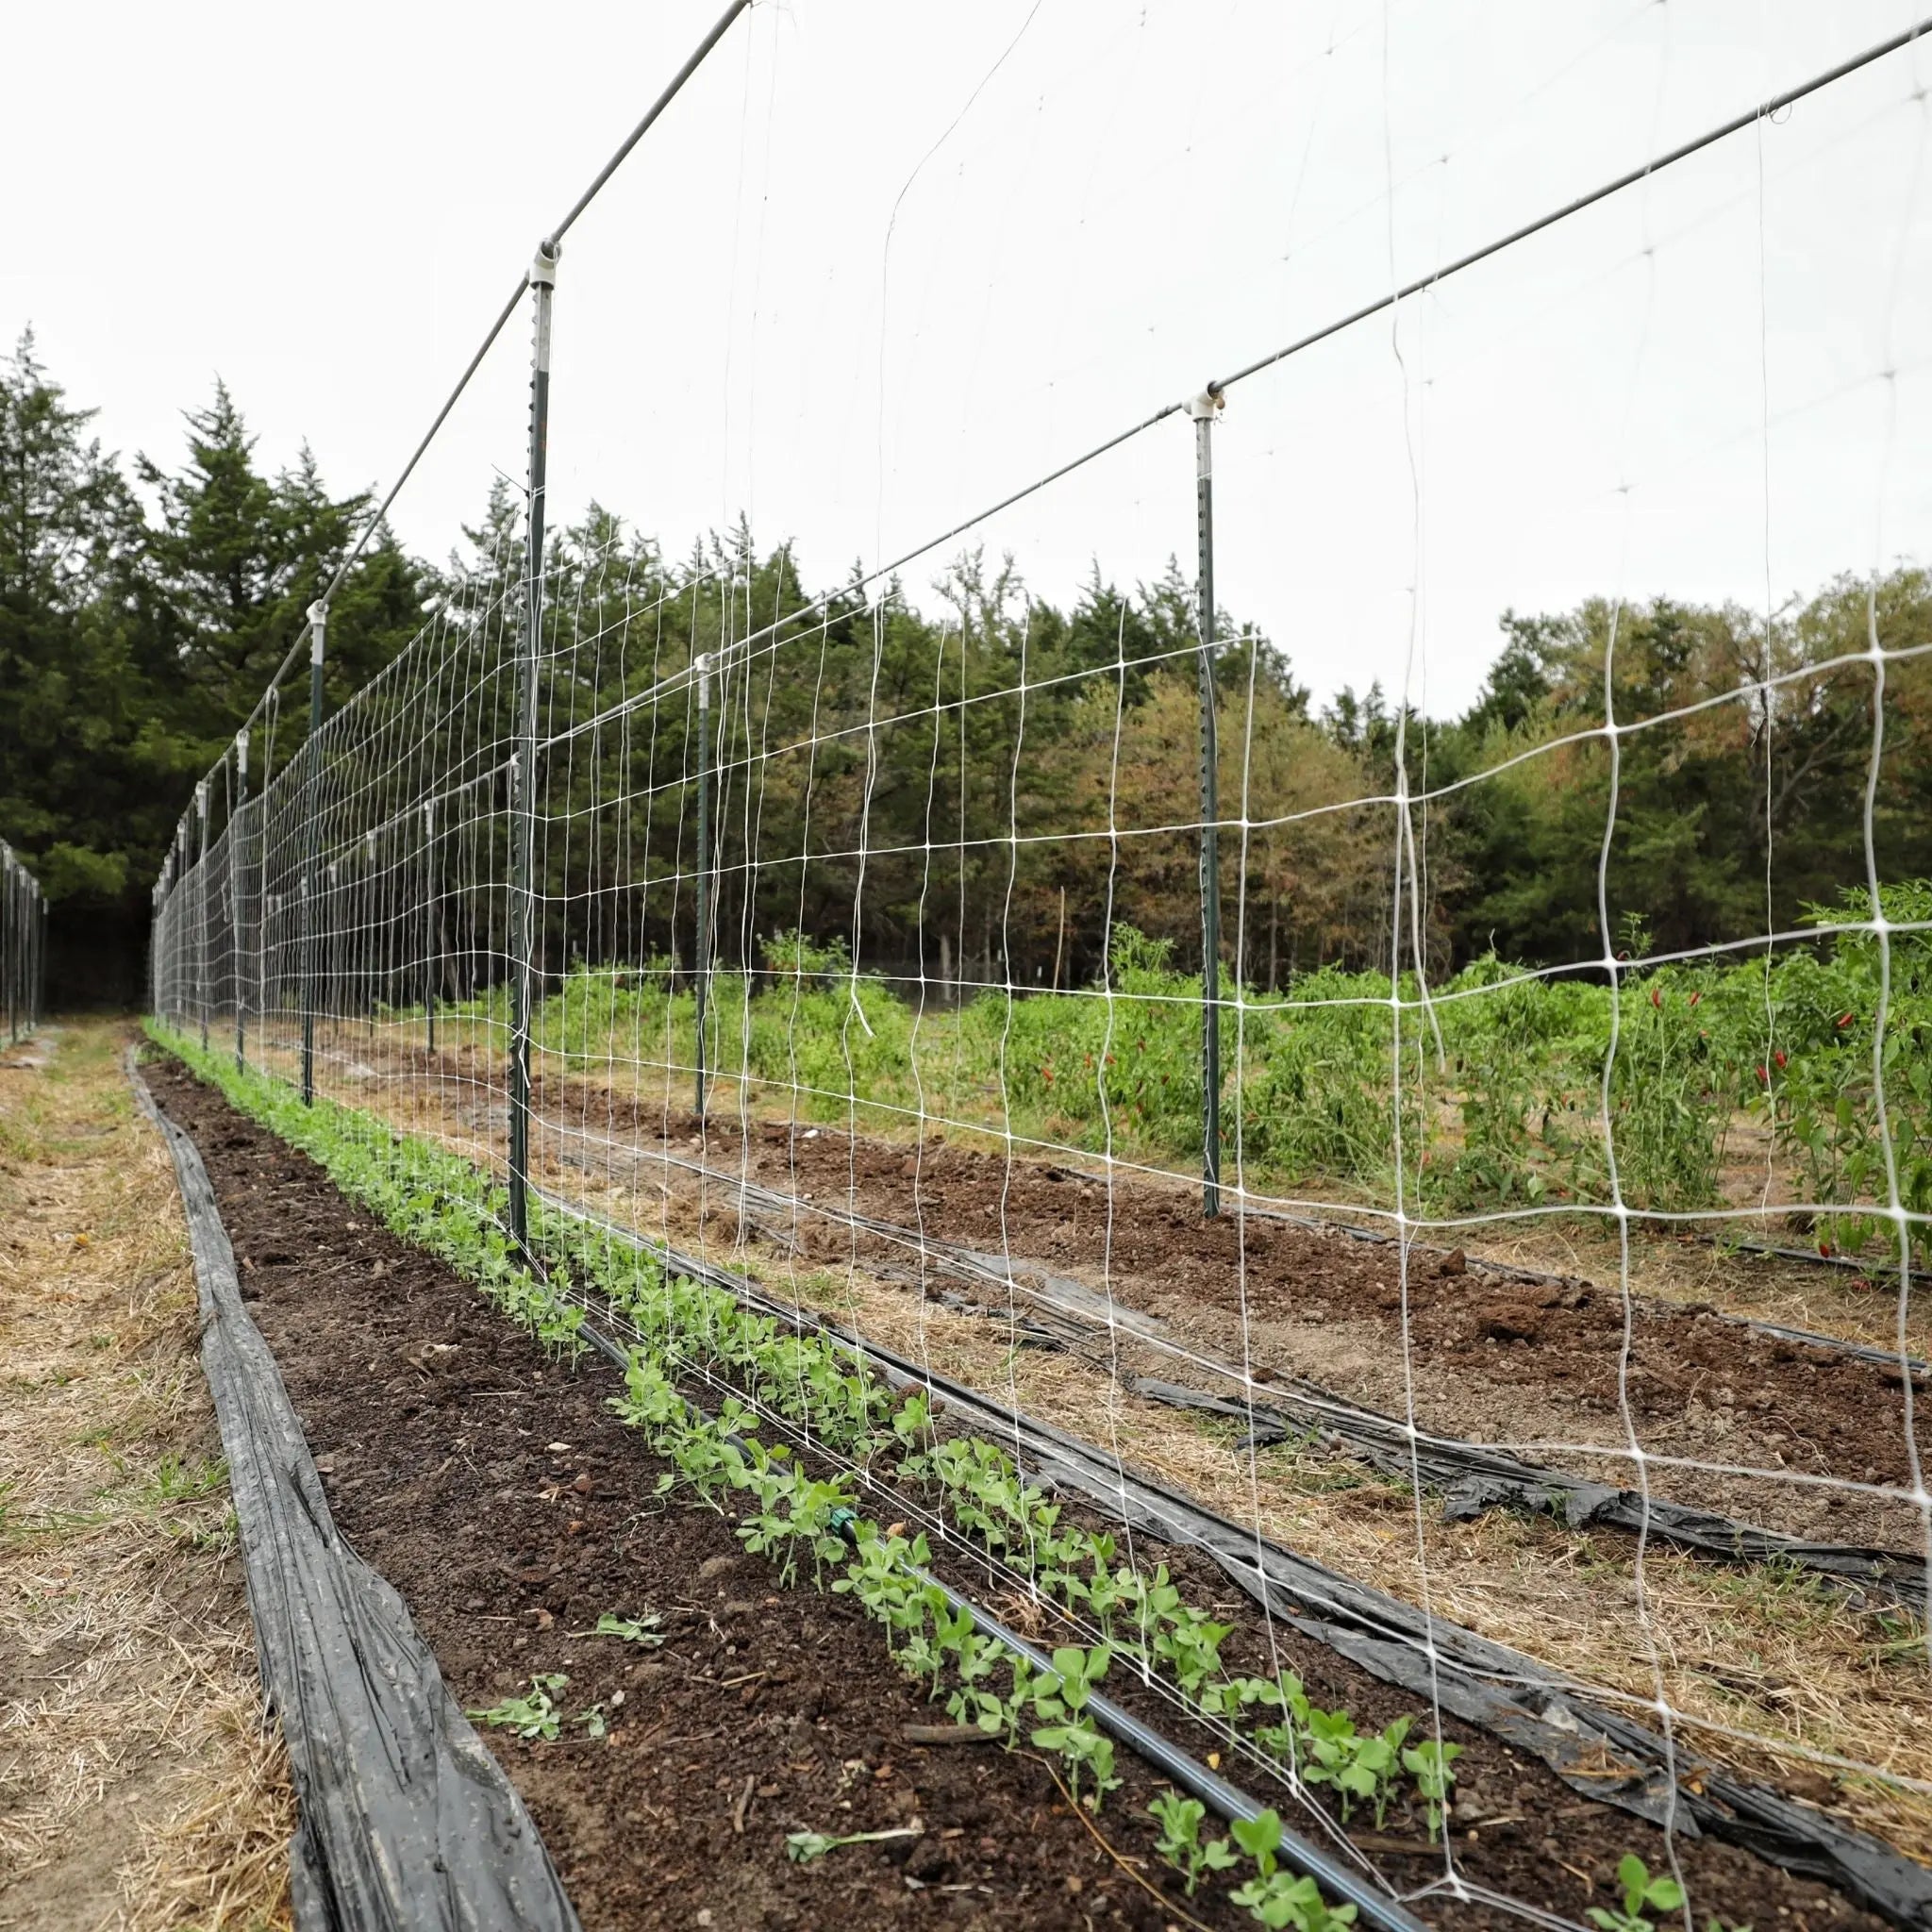
plastic plant netting Trellis NettingTrellis Netting for Cutting Flowers and Vines This durable, lightweight polypropylene trellis netting is perfect for supporting vegetables, training stems for cut flowers, and tall vines, allowing more airflow and sunlight to reach the plants. This space saving 6" mesh net is available in 3', 4', 6' widths. Get better yields and raise healthier plants using this UV stabilized, chemical resistant trellis netting. You can also use this trellis net

Trellis Netting for Cutting Flowers and Vines

This durable, lightweight polypropylene trellis netting is perfect for supporting vegetables, training stems for cut flowers, and tall vines, allowing more airflow and sunlight to reach the plants. This space-saving 6" mesh net is available in 3', 4', 6' widths. Get better yields and raise healthier plants using this UV-stabilized, chemical-resistant trellis netting. You can also use this trellis net horizontally for long-stem flowers such as dahlias, zinnias, and the like. Keep peas and pole beans supported with horizontal netting. Reduce blemishes on fruit and grow straighter flower stems with supportive trellis netting.

Note:  It is imperative to keep the netting taut as birds can become entangled in the loose mesh. 

Key Features

  • Supports crops for better airflow and sun penetration 
  • Perfect for supporting long-stem cut flowers for straighter stems
  • Flexible, tear-resistant
  • UV-stabilized
  • Helps better utilize garden/greenhouse space
  • Made of durable polypropylene
  • Works perfectly with vine clips
  • Better yields and crop success
  • Creates easier working area for better weed management
  • Reusable season after season
  • Mesh size approx. 6"x 7"
  • Netting thickness- 8g/sqm

HOW DO YOU INSTALL FLOWER NETTING?

Netting can be installed both vertically and horizontally depending on the need. Both are very simple, straightforward processes. 

Vertical Trellis Installation:

To install netting vertically, insert support posts down your rows at approximately every 20'. Next, attach the net to the support posts using string or twine. We suggest that you snake a support cable such as metal wire or other strong cord or string through the netting at the top to support the net. Tie or clip your plants to the trellis netting as they grow and begin climbing. Some plants have tendrils that will tie themselves to the netting.

This style of installation is also used for vining crops in the vegetable garden or market farm. Vegetables and fruits like peas, cucumbers, and tomatoes all benefit from support as they grow.

Horizontal Trellis Installation: 

Install garden trellis net horizontally for cut flowers. Use several layers close together. First, start by putting four wood or metal supports into the ground. Install the first two posts at equal width with your netting (i.e. 3' apart, 4' apart, 6' apart). The second set of posts should be installed 6'-20' wider. The height of the posts would depend on what you are growing.

Next, screw or bolt wooden cross bars between posts 1 and 2, and between posts 3 and 4 at the different heights that you will space your layers of trellis support at. The heights will depend on how tall your plants will grow. Typically this would be at 12", 24" and 36" from the ground.

After that step, attach the trellis netting to the cross bars by wrapping them around the crossbar and then tying string or zip ties around the net and crossbars to hold it in place. 

Finally, unroll the lightweight polypropylene trellis support netting and attach it to the cross bars between posts 3 and 4. You can continue the row by putting support posts, and cross bars every 20' apart and making the layer as long as you want. Then do the next layer the same way.

Want more information about trellis netting? Check out this helpful article.

Shipping Notes
  • Free Standard Shipping on $100+ Orders to the USA.
  • Except Preorder products are shipped in 48 hours.
  • Delivery to the USA:
  1. Standard Shipping : 3-10 business days
  • If time is of the essence, please consider selecting expedited delivery for faster service.
Exchange/Return Notes
  • We offer a 30-day return/exchange service after receiving.
  • Final sale items are not eligible for returns or exchanges.
  • To process your return/exchange, please contact us at [email protected]
  • Please click here for more details>>> Return & Exchange Policy
SKU: 70837372091

Discover Niche Categories That Outsell plastic plant netting

Top-Converting Item to Boost Your Average Order

4.8 ★★★★★
Based on 29 reviews
Sort
Highest Rating
Newest First
Oldest First
Product Reviews
W
Verified Purchase
william scott
Charlottesville, US
★★★★★ 4
Not simple, nor easy
Model: SLH20025
I wanted to add sound proof material to the bare metal areas on the floor of my Toyota Tundra. The area behind the front seats had a haphazard application of sound deadening material. There were several complications to the project which may come up in other vehicles. First is the floor covering which had plastic pillars underneath to support any weight on the cover. The sound deadening material had to be cut out so these pillars would rest on the bare metal of the floor. This required a lot of cutting with a utility knife and at times heavy scissors. The instructions say to make a template before cutting the material and I did this for the driver's side. This doubled the amount of time needed to install it. On the passenger's side I laid the rectangles of material with the backing on and pressed the floor covering onto the material. This showed where the support pillars were, which I then cut out. Second is peeling the backing off the material. This can be very difficult as the adhesive sticks to it. The backing came off in multiple pieces and sometimes took 5 minutes for one piece. They say to wear gloves when handling the material but this is impossible when trying to get the backing off. Third is pressing the material onto the metal. The instructions say to use a roller, but this was impossible for the irregular surface I was working on. The hand is the best tool to press the material on. The material seems to be of high quality and I expect it will reduce the road noise in the cab.
WAS THIS REVIEW HELPFUL?YesReportShare
Reviewed in the United States on May 18, 2025
M
Verified Purchase
Mike
Battle Creek, US
★★★★★ 5
Great sound mat for the price!
Style: 50 mil 50 SqFt, Style: 50 mil 50 SqFt
This is a good product. Many people go with KILMAT because of the value to price point. I did as well. When you clean the surface (in my case it was all painted metal) this stuff sticks very well. I do recommend you use a seam roller of some type, I used Lumiteco 3 piece roller set. This will help with adhesion and mostly flatten the overlapped edges. It also helps you see where you have rolled as it leaves little grooves. The difference when we had no sound mats and after was very impressive. We haven't finished our install yet and it is quieter than when we had an interior in the van. There are thicker mats available in other brands, but this will work great for our van build, but this helps keep the weight down. It is quality material, just be careful when you are removing the backing, the edge of the foil face can cut you. I suggest you layout where you are installing the mat and cut to fit. From what I have read, you don't need to cover every inch in the vehicle, just spot install for a big difference. I chose to cover most surfaces to help keep sound out when we are sleeping in the van. We haven't finished putting the van yet, but we have driven it around and been very satisfied with this product.
WAS THIS REVIEW HELPFUL?YesReportShare
Reviewed in the United States on December 3, 2025
P
Verified Purchase
Paul
Dallas, US
★★★★★ 5
Excellent sound deadening mats
Style: 80 mil 36 sqft, Style: 80 mil 36 sqft
Purchased these for a 2020 Lexus RX350 due to the hollow sound of the car doors when shutting. They sounded cheap. The mats are super sticky and I applied them when the doors were hot from sitting in the sun. They alubutyl sticks like crazy and the end result was perfect. Now I have solid sounding doors. Good quality product.
WAS THIS REVIEW HELPFUL?YesReportShare
Reviewed in the United States on May 20, 2026
A
Verified Purchase
Amazon Customer
Charlottesville, US
★★★★★ 5
Awesome product 👌
Style: 50 mil 50 SqFt, Style: 50 mil 50 SqFt
I love this stuff. I use it alot. Sticks great Easy to use Molds super easy Really helps with sound. Great product. I wish I could get sponsored for this product on my projects..
WAS THIS REVIEW HELPFUL?YesReportShare
Reviewed in the United States on April 30, 2026
J
Verified Purchase
john l fields
Chelsea, US
★★★★★ 5
Good product at a good price
Style: 80 mil 36 sqft
This product works great and easy to install. I do two or more vehicles a month. I switch to this brand a year ago and would recommend to everyone of my customers
WAS THIS REVIEW HELPFUL?YesReportShare
Reviewed in the United States on April 16, 2026

recommand products