Pay in installments of $7.08 with
 ,
,
 and
and

Shipping Estimate
USA
- USA
- CAN
- USA
- CAN
Ships within 48 hours · Estimated delivery Oct 17 - Oct 22
 Promo Codes Available:
For Your Every Summer RSVP, with Code: SUMMER15
Description
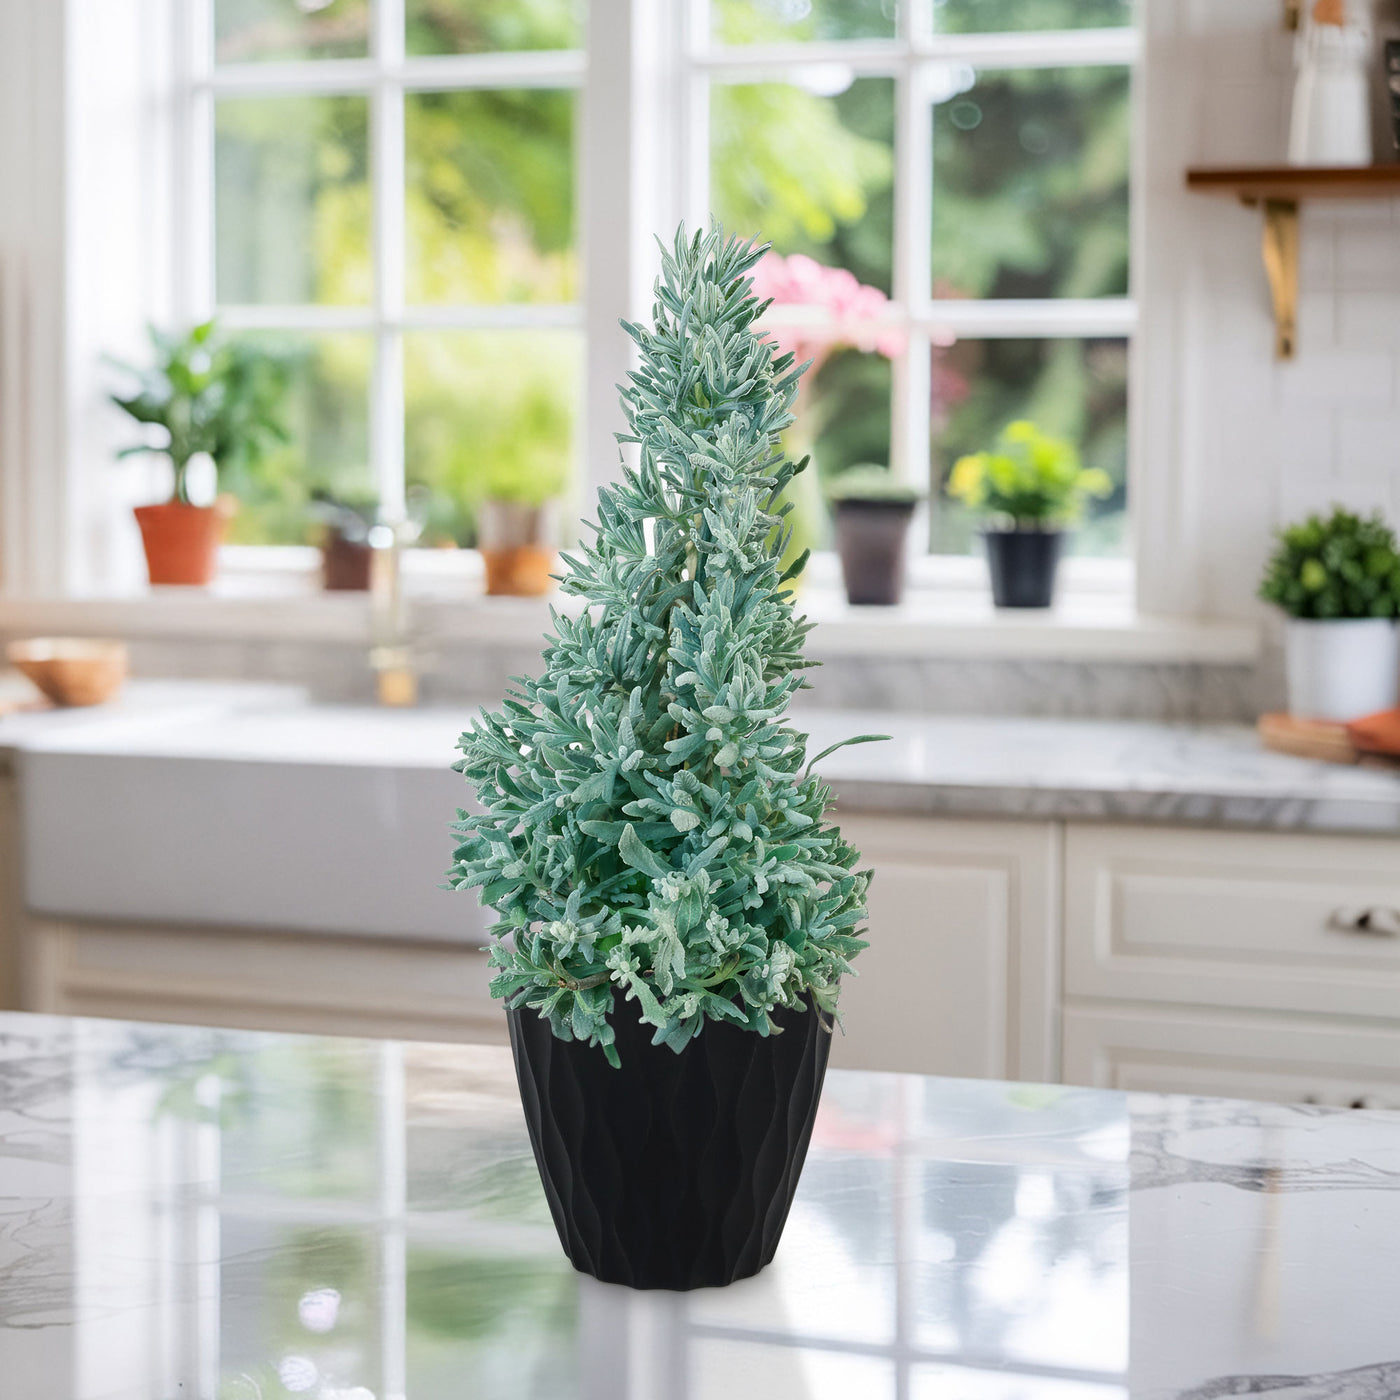
lavender plant tree Lavender Christmas TreeThe Lavender Tree is a creative and festive twist on traditional lavender plants, carefully trimmed and shaped into the form of a holiday tree. These decorative plants combine the aromatic charm of lavender with the visual appeal of a holiday centerpiece, making them increasingly popular as eco friendly alternatives to cut holiday trees. Their compact size and delightful fragrance make them ideal for tabletops or small spaces, offering a sustainable
The Lavender Tree is a creative and festive twist on traditional lavender plants, carefully trimmed and shaped into the form of a holiday tree. These decorative plants combine the aromatic charm of lavender with the visual appeal of a holiday centerpiece, making them increasingly popular as eco-friendly alternatives to cut holiday trees.
Their compact size and delightful fragrance make them ideal for tabletops or small spaces, offering a sustainable and aesthetically pleasing way to celebrate the holiday season. While it is trimmed for decorative purposes, its origins as a hardy Mediterranean herb are unchanged. Though commonly referred to as the Lavender Tree, the plant is essentially a trimmed version of lavender (Lavandula spp.), a genus known for its versatility and beauty.
The Lavender Tree showcases the iconic silvery-green, needle-like leaves characteristic of lavender plants.
When shaped into a tree, the dense foliage creates a structured, conical shape, reminiscent of traditional evergreen holiday trees.
Lavender's distinct fragrance, known for its calming and therapeutic properties, further enhances its appeal. These plants are often adorned with tiny ornaments or ribbons, adding an extra festive touch.
A lavender tree is typically compact, growing up to 2 feet tall depending on the lavender variety and pruning techniques used.
Its manageable size makes it perfect for indoor use or placement on patios and balconies, offering a decorative yet unobtrusive presence.
The blooms of lavender trees are purple or blue and usually appear during warmer months, even if the plant has been shaped into a tree. The flowers not only add a splash of color but also contribute to the plant's signature fragrance, making it a dual-purpose ornamental and aromatic addition to any space.
It acts as a natural air freshener, filling your home with a soothing aroma. Lavender is also known for its ability to repel pests such as moths and mosquitoes. Its blooms can be harvested and used in sachets, oils, or culinary recipes, adding to its year-round appeal. The Lavender Tree beautifully merges nature and holiday cheer, offering a fragrant, sustainable, and versatile centerpiece for the festive season and beyond. The Holiday Time Tree adds a festive and timeless charm to any home, making it a centerpiece for celebrations.
When and How to Water Your Lavender Christmas Tree
Like other drought-tolerant plants, the Lavender Tree can survive long periods without water once established. This resilience makes it an ideal choice for those in hot or dry climates, as it doesn’t require frequent watering. However, it’s important to understand that while lavender is drought-tolerant, it thrives best when watered correctly during its growing season to maintain optimal health and appearance.
From spring through early fall, during the growing season, Lavender Tree needs regular watering to keep the soil moderately moist but not soggy. It’s best to water deeply and infrequently, once a week, depending on your local weather conditions and soil type. In warmer climates, you may need to water more often, but ensure the plant has good drainage to prevent root rot. Allow the top inch of soil to dry out between watering to ensure the roots are not sitting in excess moisture.
From late fall through winter, during the dormant season, lavender’s water requirements decrease significantly. The plant enters a resting phase and will require less frequent watering—generally once every 2-3 weeks. Ensure that the soil is mostly dry before watering to prevent any risk of waterlogging. Be cautious not to overwater, as lavender is prone to root rot in cold, wet conditions. This reduced watering is crucial to maintaining a healthy plant during its dormant period.
Light Requirements – Where to Place Your Lavender Christmas Tree
For indoor Lavender tree care, Lavender Tree requires plenty of bright, indirect sunlight. Ideally, place your plant near a south or west-facing window where it can receive 6-8 hours of sunlight per day. If natural light is insufficient, consider using grow lights to supplement the light, especially in the winter months.
Lavender thrives with lots of light, and too little can cause leggy growth and fewer flowers. It’s important to ensure your plant is not placed in direct sunlight for long periods, as this can lead to sunburn or leaf scorch.
For outdoor cultivation, your Lavender Tree prefers full sun for at least 6 hours per day to maintain healthy growth.
In particularly hot climates, providing afternoon shade may protect it from the harsh midday sun, but it will still need ample sunlight for the best flowering and growth.
When planting outdoors, ensure the location receives plenty of direct light, especially during the growing season.
Avoid planting lavender in heavily shaded areas, as it will struggle to thrive and may develop leggy or sparse foliage.
Optimal Soil & Fertilizer Needs
The Lavender Tree prefers well-drained soil that is slightly alkaline to neutral, with a pH between 6.5 and 7.5. Lavender does not like sitting in wet soil, so make sure the plant’s pot or planting area has adequate drainage holes. Instead, make or buy a well-draining potting mix, or ideally, use our specialized potting mix, opens in a new tab that contains 5 natural substrates and mycorrhizae to promote the development of a strong root system that helps your plant to thrive.
In terms of fertilizer, the Lavender Tree is a relatively low-maintenance plant that doesn’t require heavy feeding. During the growing season, you can apply a balanced, NPK fertilizer once a year in early spring to encourage healthy growth and blooming. Be cautious not to over-fertilize, as this can lead to excessive foliage growth at the expense of flowers. During the dormant season, fertilizer is generally unnecessary. Over-fertilizing lavender can also make it more susceptible to disease and reduce its drought tolerance.
Hardiness Zones & More
When growing indoors, the holiday Lavender Tree prefers a temperature range between 55°F and 70°F, ideally kept in a well-ventilated area with indirect light. Lavender can tolerate cooler indoor temperatures but should not be exposed to drafts or temperatures below 40°F. If growing indoors, ensure the plant gets enough sunlight, as this will help maintain its shape and health. Keep the plant in a spot with good air circulation, which will also help prevent fungal issues.
For outdoor cultivation, the Lavender Christmas Tree thrives in USDA hardiness zones 5-9. It can tolerate winter temperatures down to 20°F if given enough protection, but should be covered or brought indoors in areas where temperatures regularly dip lower.
It prefers dry, arid conditions and should be planted in an area with good drainage, as it does not tolerate standing water. Outdoor humidity levels should be kept low to prevent fungal diseases. In more humid climates, providing proper airflow or growing lavender in containers can help mitigate issues.
Wildlife – Lavender Tree Attracts the Following Friendly Pollinators
The Lavender Tree is a magnet for beneficial pollinators, particularly bees, hummingbirds, and butterflies. The fragrant flowers, which bloom in late spring and summer, attract these pollinators to your garden. The nectar-rich flowers provide food for local bee populations, making it an excellent choice for gardeners looking to support pollinator health. Lavender’s aromatic oils also attract other beneficial insects, such as hoverflies, which help keep pests under control. Its pollinator-friendly nature makes it a fantastic addition to both ornamental gardens and herb gardens.
According to ASPCA, the Lavender Tree is non-toxic to pets. This makes it a safe choice for households with cats, dogs, or other animals that might be prone to nibbling on plants. Lavender’s non-toxic status means that even if a curious pet chews on its leaves, there is no risk of poisoning. This non-toxic trait is one of the reasons lavender is often recommended for homes with pets.
How to shape a lavender into a Trimmed tree
To shape lavender into a trimmed tree form, start with a healthy, well-established plant and choose a single central stem as the “trunk.” Use sharp, clean pruning shears to trim the side stems, gradually tapering them upward to create a conical shape. Begin shaping from the bottom, removing lower branches to define the base, and work upward, cutting sparingly to maintain the plant’s natural growth and avoid stress.
Regularly step back to check the symmetry, ensuring the sides are even and the top tapers to a narrow point. For the best results, prune in early spring or after the flowering season to encourage new growth while maintaining the desired shape. With consistent maintenance, your lavender plant will transform into a fragrant, festive display.
Key Takeaways
- The plant’s iconic lavender scent not only adds a festive ambiance but also promotes relaxation and helps repel pests like moths and mosquitoes.
- These cold-hardy Lavender Trees can tolerate temperatures in USDA zones 5-9 with proper winter protection.
- Its blooms can be harvested and used in sachets, oils, or culinary recipes, adding to its year-round appeal.
- Once established, these plants are exceptionally drought-tolerant, requiring minimal watering, making them ideal for regions with limited rainfall.
- These plants are easy to care for, thriving in well-drained soil and needing only occasional pruning to maintain their shape.
- These trees are a sustainable choice, reducing waste compared to traditional cut Christmas trees and doubling as a practical herb after the holidays.
The Bottom Line
Overall, the Lavender Tree is a perfect blend of festive charm and practical elegance, offering a unique way to celebrate the holidays while enjoying the benefits of a living plant. Its silvery-green foliage, aromatic fragrance, and vibrant blooms make it an eye-catching and versatile decoration, while its easy-care nature ensures it remains a low-maintenance choice. Thriving in well-drained soil and requiring minimal watering, this drought-tolerant plant is also hardy enough to survive cooler temperatures with proper care. Beyond the holiday season, it can be reshaped or grown naturally, providing year-round beauty and functionality. With its sustainable and eco-friendly appeal, the Lavender holiday Tree is a thoughtful and delightful addition to any home.
Enjoy indoors for 1-2 weeks in a bright area of your home. Best outdoors in full sun in pots or beds. Plant in light, well-drained soil. Allow soil to dry to the touch between thorough waterings. Trim to maintain shape.
*Holiday trees will ship with pots for all sizes
Shipping Notes
- Free Standard Shipping on $100+ Orders to the USA.
- Except Preorder products are shipped in 48 hours.
- Delivery to the USA:
- Standard Shipping : 3-10 business days
- If time is of the essence, please consider selecting expedited delivery for faster service.
Exchange/Return Notes
- We offer a 30-day return/exchange service after receiving.
- Final sale items are not eligible for returns or exchanges.
- To process your return/exchange, please contact us at [email protected]
- Please click here for more details>>> Return & Exchange Policy