SKU: 77858356820
best potting soil for a peace lily

best potting soil for a peace lily Buy Peace Lily Potting Soil for Sale

Sale price$23.37 Regular price$25.97
Save 10%

Pay in installments of $6.49 with ShopPay, AfterPay and Klarna

Shipping Estimate
USA
  • USA
  • CAN

Ships within 48 hours · Estimated delivery Jul 19 - Jul 24

Promo Codes Available:

For Your Every Summer RSVP, with Code: SUMMER15

Description

best potting soil for a peace lily Buy Peace Lily Potting Soil for SaleKeep Your Peace Lily Thriving with the Right Soil Give your peace lily the perfect growing environment with our premium Peace Lily Soil, a specially formulated blend that balances moisture retention with excellent drainage. Unlike ordinary mixes, this potting soil for peace lily is designed to meet adequate peace lily soil requirements, preventing root rot while encouraging vibrant green leaves and long lasting white blooms. How to Repot Peace Lily

Keep Your Peace Lily Thriving with the Right Soil 

Give your peace lily the perfect growing environment with our premium Peace Lily Soil, a specially formulated blend that balances moisture retention with excellent drainage. Unlike ordinary mixes, this potting soil for peace lily is designed to meet adequate peace lily soil requirements, preventing root rot while encouraging vibrant green leaves and long-lasting white blooms.

How to Repot Peace Lily Plants

Repotting is simple with the right peace lily repotting soil. Gently remove your plant from its container, loosen the root ball, and trim away any dead roots. Place in a slightly larger pot, then fill in with our nutrient-rich peace lily soil mixture. Water well and return to a bright, indirect light location for best results.

When to Repot a Peace Lily Plant

Peace lilies should be repotted every 1–2 years or whenever roots begin to crowd the pot. Fresh peace lily soil mix provides better aeration, replenished nutrients, and the ideal loamy texture for new growth. Spring is the best time to refresh your peace lily for healthier roots and more blooms.

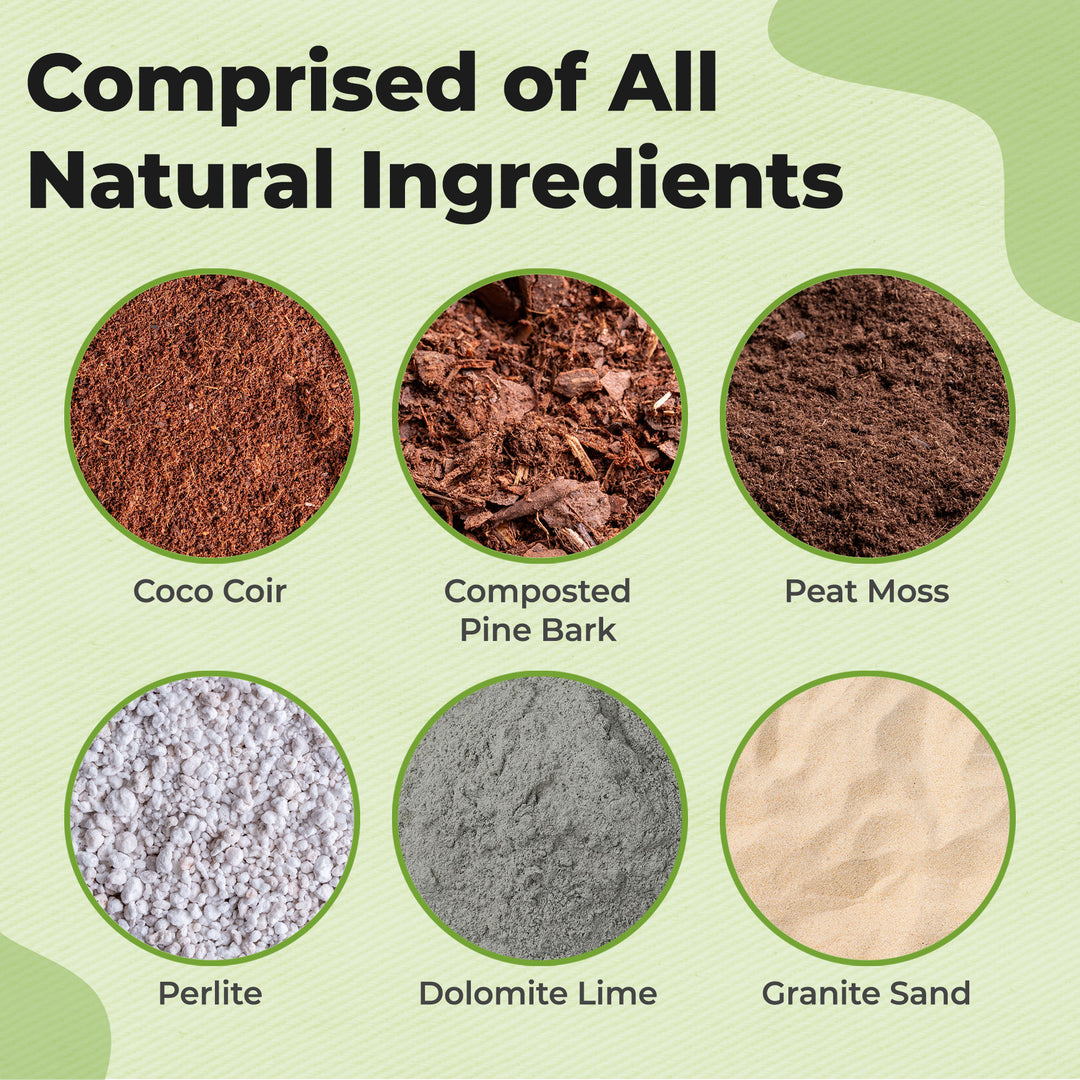
Ingredients in Our Peace Lily Soil Mix Recipe

This chunky, loamy mixture is the best soil for peace lily, providing both aeration and water retention to prevent overwatering issues.

  • Composted Pine Bark  –  Improves airflow and supports strong root systems

  • Peat MossRetains the perfect amount of moisture while creating a slightly acidic environment

  • PerliteEnhances drainage and prevents compaction

  • Coconut CoirEco-friendly fiber that supports root strength and consistent hydration

  • Granite Sand – Adds grit for drainage and soil stability

  • Dolomite Lime – Balances pH and adds calcium & magnesium for overall plant health

Why Gardeners Love Our Peace Lily Soil

  • Well-Draining Yet Moisture-Retentive – Prevents root rot while keeping soil evenly hydrated

  • Encourages Vibrant Blooms – Nourishes healthy foliage and signature white flowers

  • Perfect for Semi-Aquatic Houseplants – Works beautifully for peace lilies and other tropicals

  • Convenient Sizes – Available in 4 qt. and 8 qt. resealable bags for easy indoor repotting

  • Hand-Mixed in the USA – Over 40 years of horticultural expertise in every bag

With our premium Peace Lily Soil, you’ll have the perfect foundation for lush growth and thriving blooms—keeping your peace lily happy, healthy, and beautiful season after season.

Happy planting!

Shipping Notes
  • Free Standard Shipping on $100+ Orders to the USA.
  • Except Preorder products are shipped in 48 hours.
  • Delivery to the USA:
  1. Standard Shipping : 3-10 business days
  • If time is of the essence, please consider selecting expedited delivery for faster service.
Exchange/Return Notes
  • We offer a 30-day return/exchange service after receiving.
  • Final sale items are not eligible for returns or exchanges.
  • To process your return/exchange, please contact us at [email protected]
  • Please click here for more details>>> Return & Exchange Policy
SKU: 77858356820

Discover Niche Categories That Outsell best potting soil for a peace lily

Top-Converting Item to Boost Your Average Order

4.7 ★★★★★
Based on 6 reviews
Sort
Highest Rating
Newest First
Oldest First
Product Reviews
D
Verified Purchase
David Spencer
West Palm Beach, US
★★★★★ 5
Good stuff
Material Type: 157mil Closed Cell Foam, Style: 157 mil 36 SqFt
Good stuff, easy to use, self adhesive backing contours around curves easily and works great.
WAS THIS REVIEW HELPFUL?YesReportShare
Reviewed in the United States on April 29, 2026
S
Verified Purchase
stookie778
Waukegan, US
★★★★★ 5
Works amazingly, but only if you install it correctly.
Material Type: 157mil Closed Cell Foam, Style: 157 mil 36 SqFt
If you purchasing Siless Liner 157 mil (4 mm) Sound Deadening mat, to block unwanted sounds in your car, this is what you need to buy. But wait! It's not the only thing you need to buy if you want to "actually" deaden sound. By itself, it will definitely block a noticeable amount of sound, and, most likely, that's all you realistically need. But... But... If you want the Siless Liner Sound Deadening Mat to really help you take it up a few notches, to get the best sound almost bordering on soundproofing, listen up. You will have to install traditional butyl rubber first. Doesn't have to be the Siless brand, but I'm sure they would love to sell both to you, I used both Killmat (80mil) and Noico (50mil). I have a Honda S2000. It's a two-seater convertible sports car if you don't know what this car is, and it's loud when I'm driving above 60mph. I also happen to have a sound system installed as well. Other than that, the car is stock. I first installed the butyl rubber on the car's interior sheet metal. I went all out and covered everything I could. I didn't need to but I wanted to. I was extremely impressed with the results. But I wanted to go further. Not because I needed to but because just wanted to see what it would be like. So I bought Siless Liner 157 mil (4 mm) 36sqft Sound Deadening mat to go on top of the butyl rubber mats. I put this over every area I installed the butyl rubber. I had to be careful of clearance issues since I added a significant amount of underlayment, and you should too. If you put butyl rubber sound-deadening materials in 50% of the total interior area, you'll hear a noticeable improvement. If you put butyl in about 80% of the total area, you'll be even more amazed at the improvement, compared to before. I originally did all the above myself, so that's my experience and so your mileage may vary. I then installed the Siless Liner Sound Deadening mat over every place I could even going further than I could with the butyl rubber. I used the Siles Liner in areas where butyl rubber would not have been effective, such as the roll bar hoop area and large empty cavities or holes. I covered everything I could, firewall, doors, floor pan, transmission tunnel, trunk, trunk lid, fuel tank area, rear quarter panels, and rear-wheel tunnels, in Siless Liner Sound Deadening Mat. WOW!! The Siless Liner Sound Deadening Mat was the icing on the cake! Let's not forget, this car is a convertible sports car so it will never be a quiet ride, ever. But I can now actually have a conversation with a passenger at a normal-ish volume! This also means I can now have a normal hands-free phone call without having to plug one ear to block out the noise! My sound system sounds so much better! Just by going through the install process, I looked for any vibration, rattle, squeak, and noise-prone areas to either eliminate or reduce unwanted noise production. If you forget this step, the inside and outside of your car will rattle and buzz. I skipped this step the first time around. But did it right before I installed more butyl rubber and the improvement was impressive, especially inside the car. Outside the car, I didn't notice a difference until I put the last layer of Siless Liner Sound Deadening Mat. The sound deadening mat works both ways from what I can tell. If I turned up my music, as loud as I occasionally do, parked in the attached garage to the house, with the garage door closed, I would be barely able to tell the car was playing music in the garage. It sounds like it is another car, just a little bit down the street, with a very loud base. If you stand 20 feet away outside the car, the sound system is noticeable, but not obnoxious by a long shot. Get a 3 piece wood/metal roller set as well, which makes quick work of large areas.
WAS THIS REVIEW HELPFUL?YesReportShare
Reviewed in the United States on December 23, 2021
L
Verified Purchase
Ligia
Pawtucket, US
★★★★★ 5
Better than Kilmat
Material Type: 157mil Closed Cell Foam, Style: 157 mil 36 SqFt
Great adhesion, and you can immediately see the sound difference when you rap the area and compared it to another area without it. Also, very easy to cut and apply. Once on, you may not be able to peel it and reposition it, so be sure where you want it.
WAS THIS REVIEW HELPFUL?YesReportShare
Reviewed in the United States on March 2, 2026
J
Verified Purchase
J M.
Whiting, US
★★★★★ 3
Not much noise reduction…
Material Type: 157mil Closed Cell Foam, Style: 157 mil 36 SqFt
Easy to install but did not provide much sound dampening…
WAS THIS REVIEW HELPFUL?YesReportShare
Reviewed in the United States on April 28, 2026
T
Verified Purchase
Travis McKinstry
Omaha, US
★★★★★ 5
High quality, super sticky, very effective
Style: 30 sqft
As long as the surface is thoroughly cleaned, these mats will stick to just about anything. They provide my car with a tremendous amount of sound dampening and have made riding in the car 10 times more enjoyable. I drive a Toyota Yaris and although the engine is built like it's meant to last forever (imagine that), the rest of the car is not of high quality. Which means we used to get A LOT of noise coming from the road, other cars, etc. After I installed these mats which, by the way, I wasn't able to install on every surface I wanted to install them on (due to lack of tools to be able to disassemble certain parts of the interior), the noise coming from outside the car is nearly completely gone. I covered the underside of my hood, the entire interior part of the hatchback, most of the floor in the trunk / spare tire well, and the entire interior side of the doors. The parts I couldn't get to (or didn't want to) were: the ceiling, underneath the driver & passenger seats, behind the dash and the floor for the 2nd row seating. As you can see I left a lot of surfaces untreated with this product AND STILL it blocks most of the sound. To note: people recommended getting the roller tools to help install these mats. I got a few of them in different sizes and they worked O K. Not because of the quality of the tool but because some places you need to install these mats in don't have enough clearance to use the tool. That being said, for the larger surfaces, the roller tools help a lot. Also I found it very beneficial to use aluminum tape while installing these. The tape I used is specifically designed for materials that undergo high temperature changes (like your dryer vents, etc.). This wasn't because the mats were not sticky enough but because there were some places I installed the mats with small gaps between them. I'd also recommend getting some kind of fluffy insulation-type material for large spaces that need noise dampening. Rock wool, for example, worked great for me. As an example, the interior sides of the 2nd row seating walls had large spaces between the plastic interior cover and the metal part of the car wall. I'd install the mats on the metal but was left with 6" - 7" of space between it and the plastic cover. I chose to fill those spots (and spots like it) with insulation which provided EVEN MORE noise dampening.
WAS THIS REVIEW HELPFUL?YesReportShare
Reviewed in the United States on November 25, 2024

recommand products